SDS Knowledge Base: Kurzweil 3000
Kurzweil 3000 is an interactive text-to-speech platform that allows you to have digital content read aloud to you. This means that you can download your course readings from Canvas and have them read to you! You can also use Kurzweil to take notes, dictate ideas, organize your thoughts for papers, and more! The best part is, it is FREE for all DU students, faculty, and staff!
This page is your go-to resource for all things Kurzweil. If your question is not answered here, please contact Student Disability Services at SDS@du.edu.

How To Log Into Kurzweil
Step 1
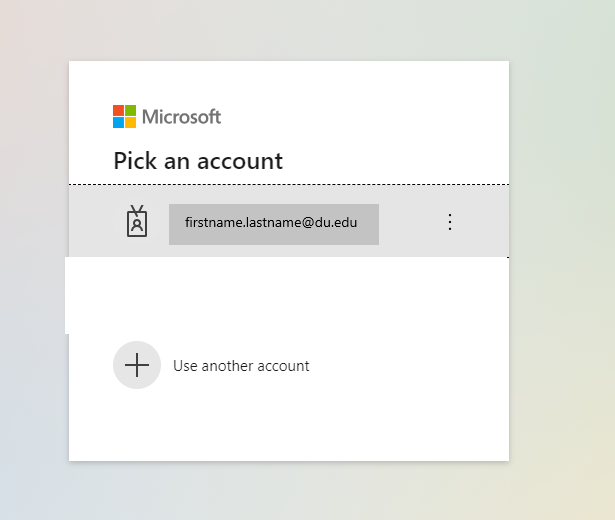
Navigate to Kurzweil3000.com. Click on “Log in with Microsoft”

Step 2
Log in with your DU email and password.
Congratulations! You are now on the Kurzweil home screen.
How to Open and Read Documents in Kurzweil
Step 1: Ensure your Desired Document is Saved
Make sure your document is saved on your computer or cloud service (OneDrive/Google Drive). If you are trying to get a reading from Canvas to be read in Kurzweil, you will need to download it first.
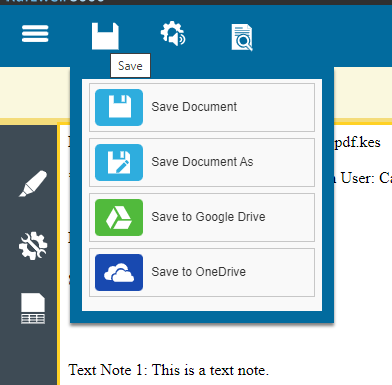
Step 2: Upload your Document
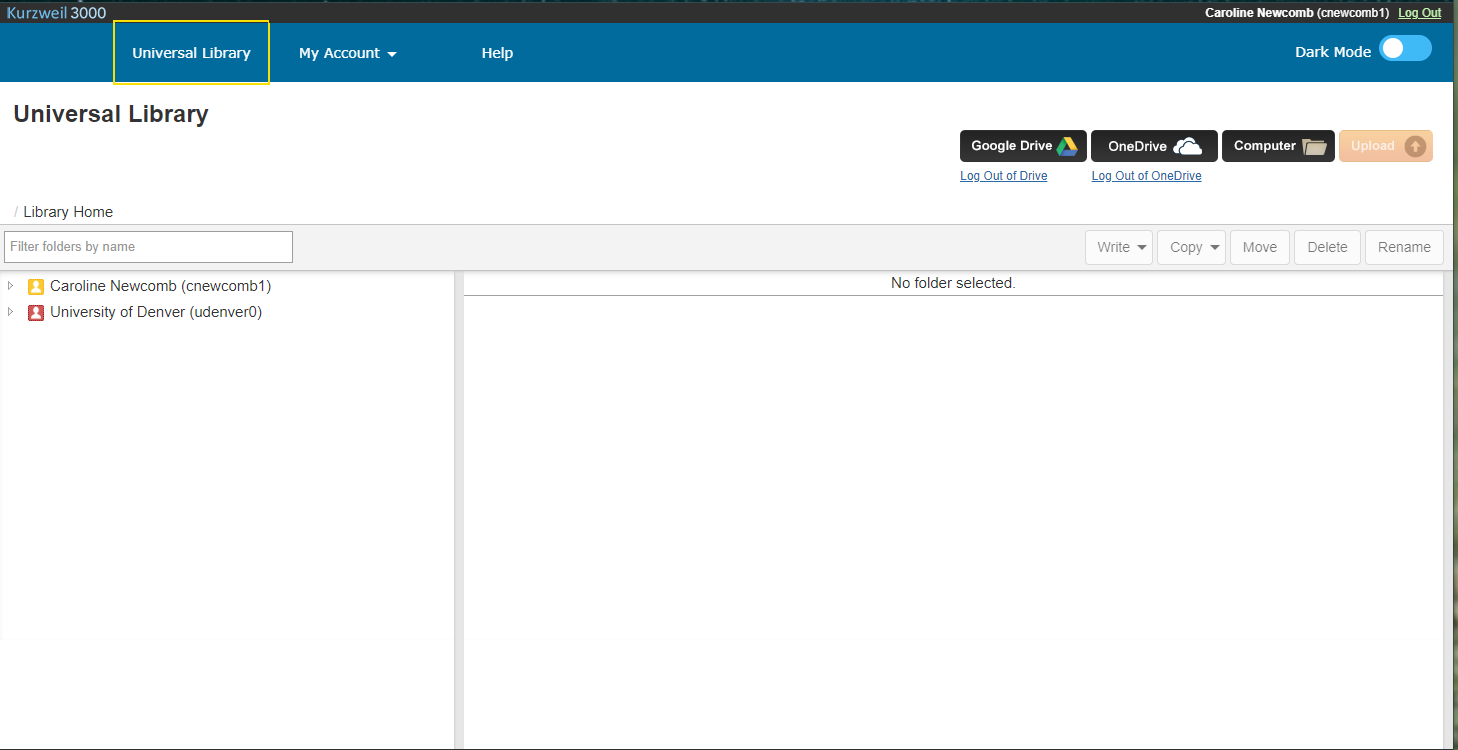
On the right side of your screen, there are four buttons: Google Drive, OneDrive, Computer, and Upload.

Uploading with Google Drive or OneDrive
- Click the button for the platform where you saved the desired document (Google Drive or One Drive)
- A pop-up screen will appear. Log in using the screen
- Locate your document in your Drive.
- Select the document, then press select. The document will upload and you are ready to read!
Uploading using Computer
- Click the Computer button
- Select the file you wish upload
- Press ok. The document will upload and you are ready to read!
Uploading using Upload
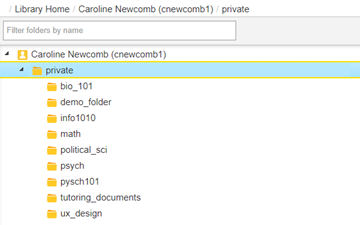
- On the left side of your screen, you should see your name. Click on it
- Files should appear below
- Click “private”
- If you wish to place the file in a specific folder you have created, select that folder. (To create a folder, right click on private (Mac users: ctrl+click).
- Click upload
- Select the document from your computer that you wish to upload
- Press ok. The document will upload and you are ready to read!
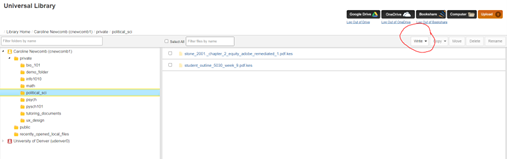
Step 3: Read your Document
Open your document
You can find the document in either your recently opened local files folder or in the folder you uploaded the document to.
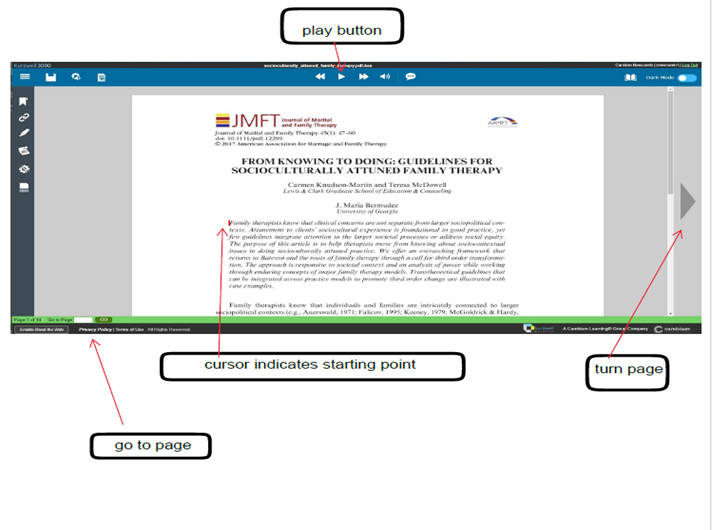
Pick your starting place
Decide where in the document you want to begin you reading. Click there with your mouse. You can navigate to other pages using the arrows on either side of the screen or the “go to” feature at the bottom of the screen.
Play
Press the play button in the upper ribbon to play.

How To Customize Your Reading Experience
Step 1: Open Audio Options
Go to the audio options icon. It looks like a gear with a speaker inside of it.

Clicking on the audio options icon will open a dialog box. This box will give you options to change your reader voice and reading speed. Adjust your preferences accordingly.

Step 2: Customize your voice, reading speed, and more.
Select your desired voice and reading speed. We recommend trying several different voices to find your favorite!
How to Highlight and Extract Notes in Kurzweil
Highlighting Text
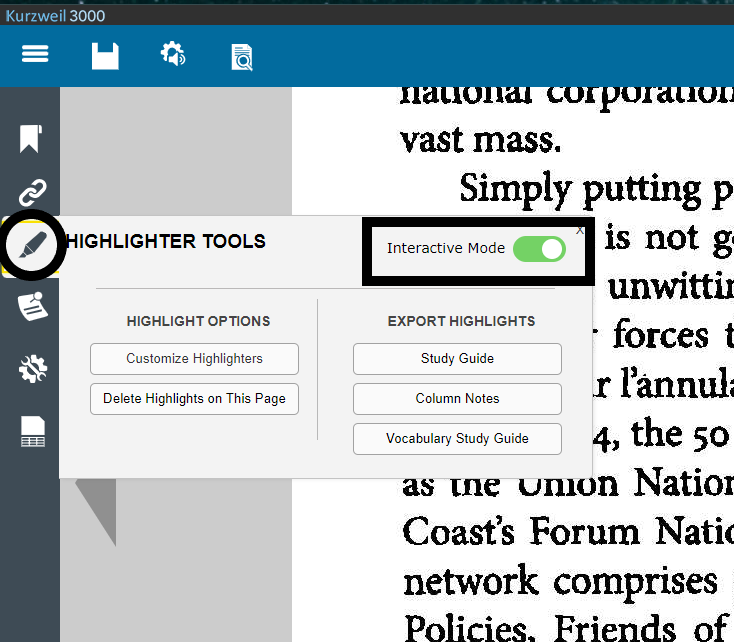
Open the Highlighters dialog by selecting the pen icon on the left side of your screen. Click the toggle button for interactive mode.
In the document, drag-select the text you want to highlight, circle, or cross out. Then select the color you wish to use.

Now your text has been highlighted!

Deleting Highlights
If you decide you no longer wish to have something highlighted, deleting it is easy!
Hover your mouse over the highlighted text. A small "X" in a box will appear at the end of the highlighted section.
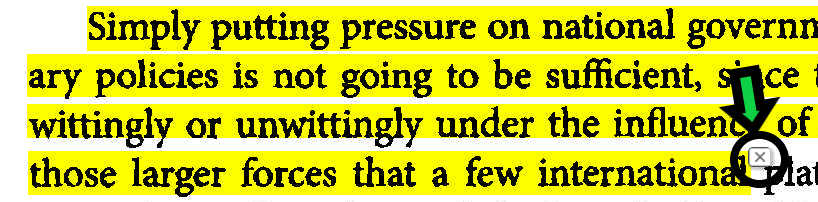
Click this "X" and that highlighted section will no longer be highlighted.
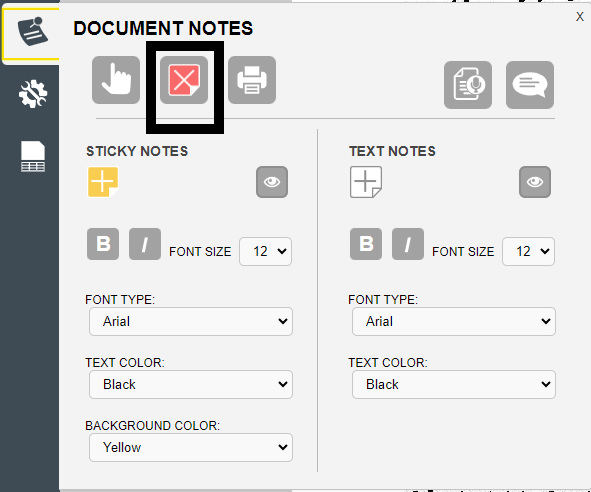
Adding Notes in Kurzweil
You can also add notes in a document in Kurzweil. You have several different choices of notes types:
- Voice Note: Create a recording of a note
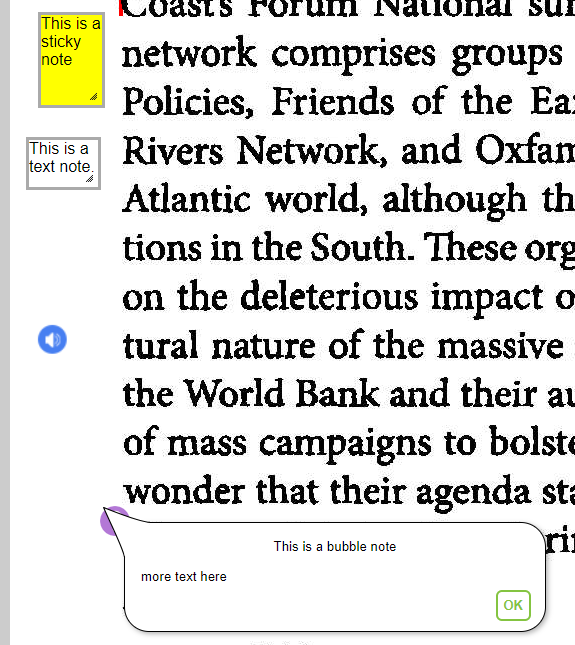
- Bubble Note: Create a note that will be read aloud to you. You can also use this feature to create question and answer style notes.
- Sticky Note: A sticky note that you can type in.
- Text Note: A textbox that you type in.
On the left hand tool bar, select the notes button.

Select the type of note you wish to create.
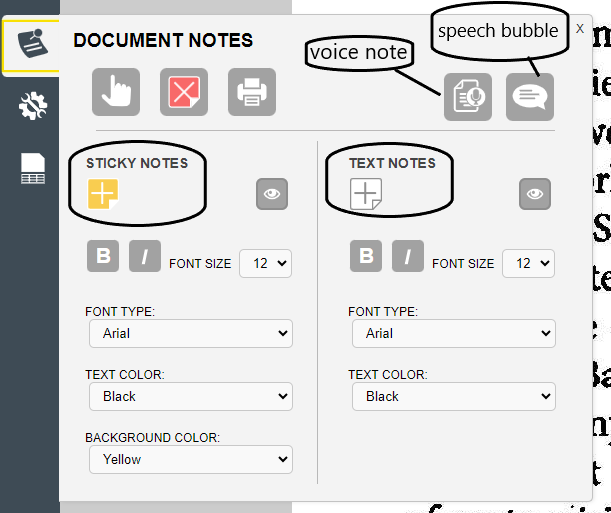
In your document, click where you wish to place the note. Then type or dictate your note!
To delete a note, go back to the notes bar and select the red square with an "X" on it. Then, click the note you would like to delete.
Extracting Highlights and Notes
After you are don’t highlighting, open the highlighters dialog box and go to the area that says “Export Notes.” Then select “study guide.”
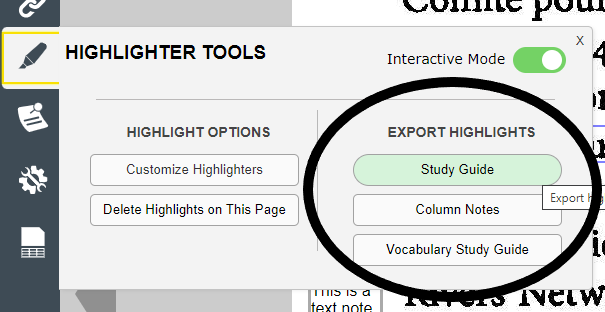
When a pop-up box appears, press ok. We do not recommend going to advanced settings, as that part of the program can be buggy.
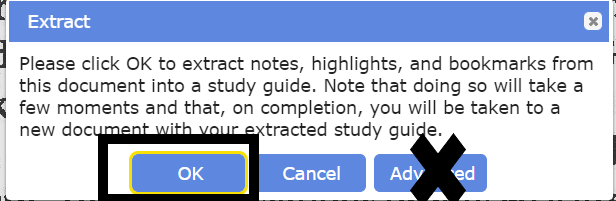
Your notes will open in a new page.
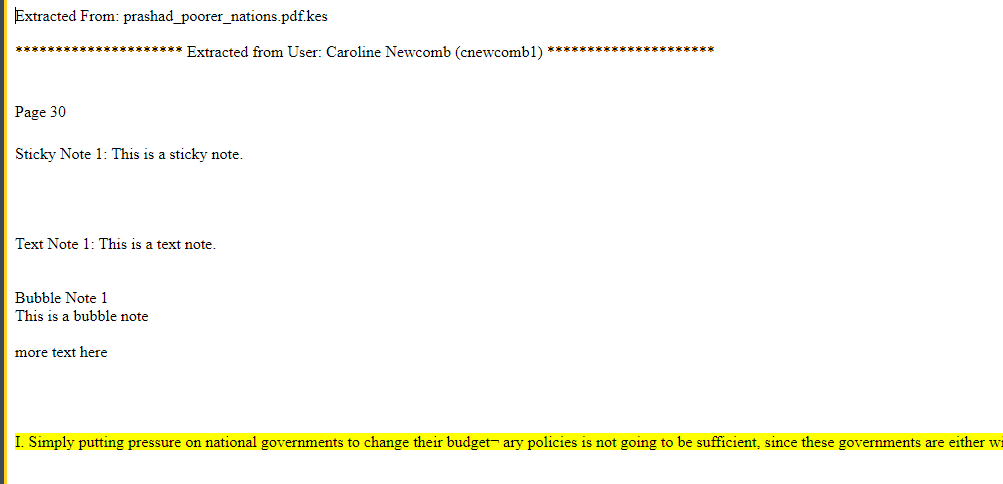
Be sure to save any notes in Kurzweil, or copy and paste them to a new Word document.
Writing and Outlining in Kurzweil
Watch a video of using the writing and outlining tools in Kurzweil.
Step 1: Select a folder
You will need to either create or select a folder in which to have your new writing document saved.
Step 2: Open a document
Go to Write, then open either your outline or a new draft.
Step 3: Begin writing
You can choose to use dictation or predictive text to support you. You may also choose to use a split screen to have your outline and draft side-by-side.
Tools to support writing:
Spell check and Predictive text
Change to split screen or outline

Use dictation

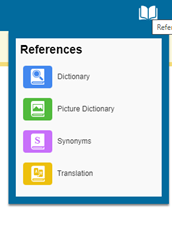
Reference Tools to support your writing

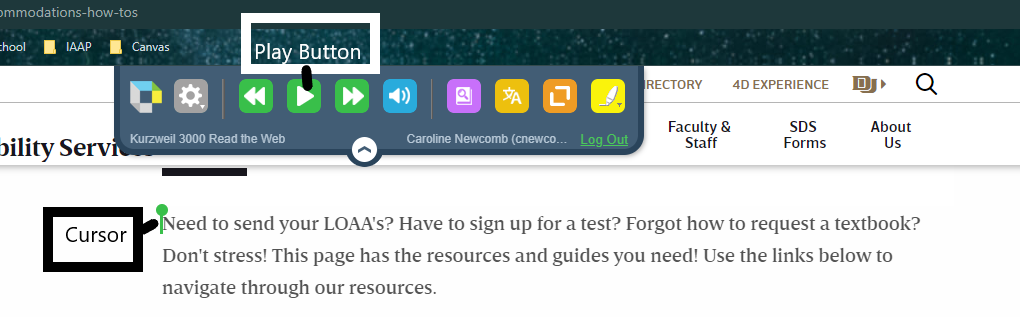
Using Kurzweil Read the Web
While some webpages, particularly news sites, have built-in audio components, not all do. Kurzweil Read the Web is here to help bridge that gap. It is a Google Chrome extension that reads aloud most webpages for you! You will need to use the Google Chrome browser in order to access Read the Web!
First, add the Read the Web extension to your Chrome browser.
Once you have added Read the Web to your Chrome Browser, you can start using it to read aloud webpages, including Canvas!
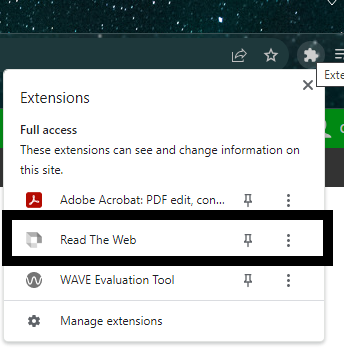
Step 1: Start Read the Web
Go to the puzzle piece to the left of your URL bar.
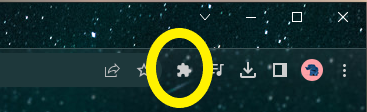
Click on it, then select Read the Web
Step 2: Log in
Log in using the Microsoft Login icon. Log in with your DU email and password.

Step 3: Start Reading!
Click where you want the program to begin reading. A green cursor will appear. Then, press play!