SDS Knowledge Base: Glean

Glean (or Glean for Education) is an audio recording platform that allows you to record and transcribe your lectures to support your notetaking. It is a slick all-in-one platform  available to students who have been approved for the audio recording in class accommodation. 


SDS can add students who are approved for this accommodation to our account, when seats are available. If you are approved for the audio recordings in class accommodation, and would like to be added to Glean, please contact SDS@du.edu

students sit in a lecture hall paying attention to the instructor

How To Record and Take Notes with Glean

The video above walks you through how to make a recording on Glean. It is important to take short notes or use the lightening mode buttons (important, review) as you go, so that you are able to more easily find the information you were looking for when you review your notes while studying. 

Step 1: Open Glean

Navigate to the Glean platform. 

Step 2: Press "New Event"

The new event button will usually be in the upper left corner of your screen. The first time you ever record, the button will be in the center of the screen. 

The glean homepage. In the upper left corner, the "new event" button is highlighted.

Step 3: Give your Event a Useful Title

We recommend the name and date of the class (e.g., BIOL 4360 5/7/23), but you can do what works for you!

The glean events page. An arrow points to the text box for adding an event title.

Step 4: Start Recording

Press the record button (red circle at the top left). Then select "microphone." Recording will begin automatically. 

The glen events page. On the left the record button is highlighted. The dropdown menu from record has the microphone option highlighted.

You will be able to see the recording going on the right side of your screen. Recording lines are thicker when someone is speaking and thinner when they are not. 

a glean recording event. The visual representation of the recording appears on the right hand side.

Step 5: Take Short Notes As You Go!

Audio recordings are meant to supplement, not replace, notetaking. Take short notes throughout class so that you are able to more easily navigate and find information in your recording when you review the notes to study! If you struggle to pay attention and take any notes, check out lightening mode!

Use the textbox to type a regular note. It will sync with the audio recording. 

A recording on glean. Notes appear on the right hand side, and are also marked with placeholders in the recording.

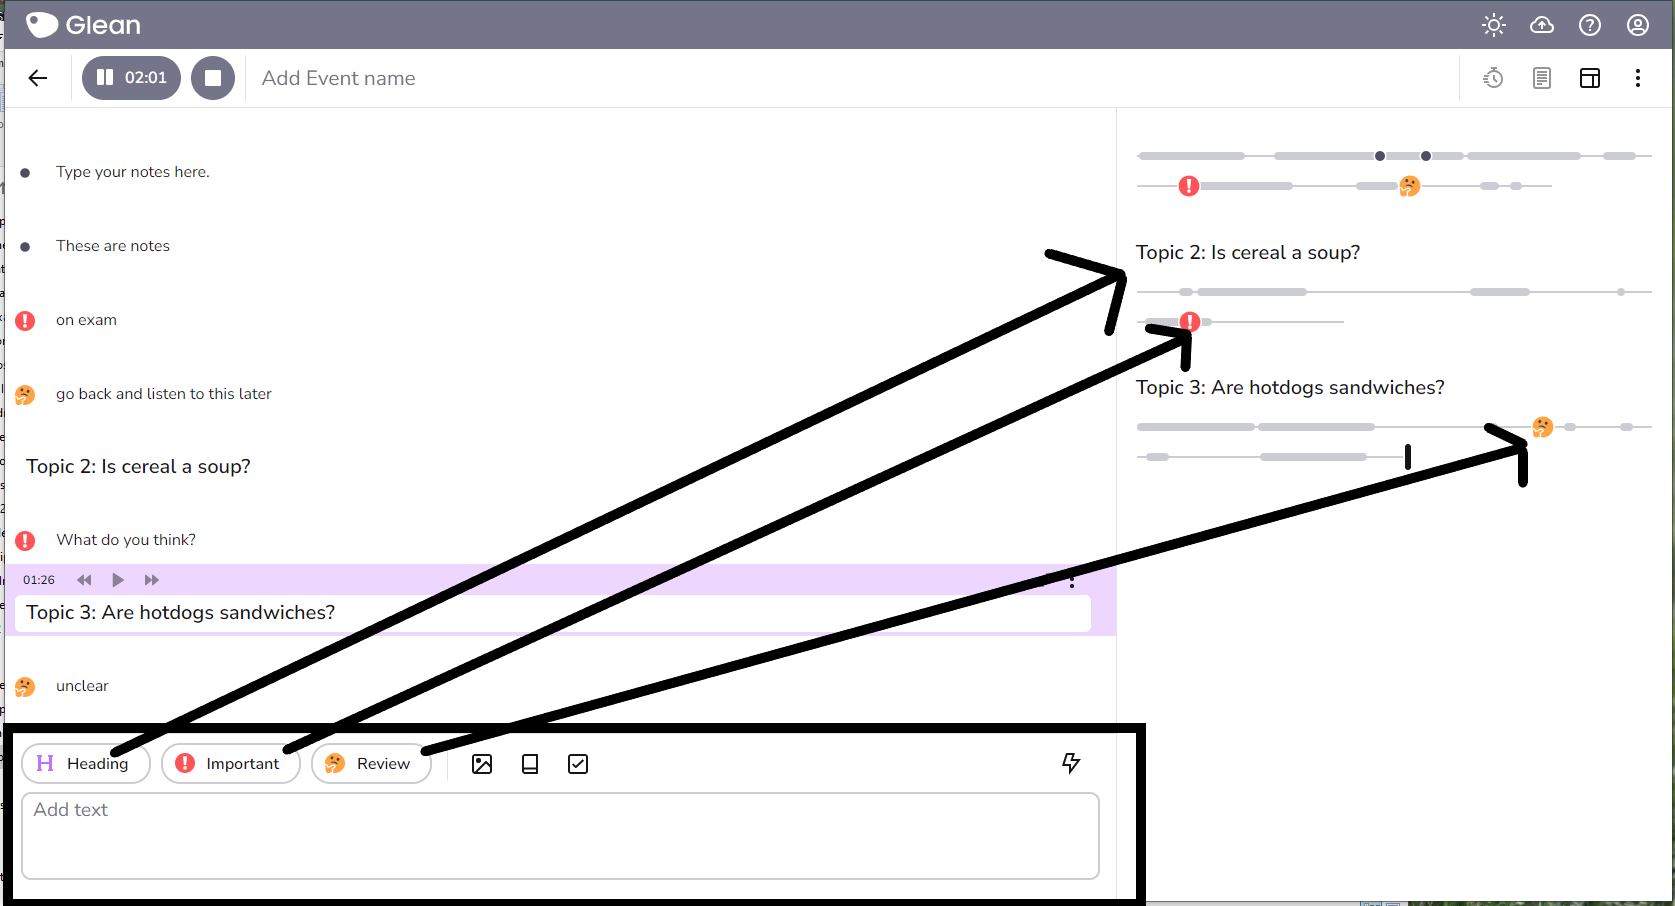
You can also mark notes as important or to review, so that you know you need to go back to them later! Do this with the important and review icons. 

Use the heading button to break up the recording into more manageable chunks. 

A recording on glean. Notes appear on the right hand side, and are also marked with placeholders in the recording. Arrows point to indicate where a heading has been used, as well as where the important and review buttons have been used.

Step 6: Ending Your Recording

To end your recording, press the stop button. 

the stop button is to the left of the record button on Glean.

Step 7: Clean Up the Audio!

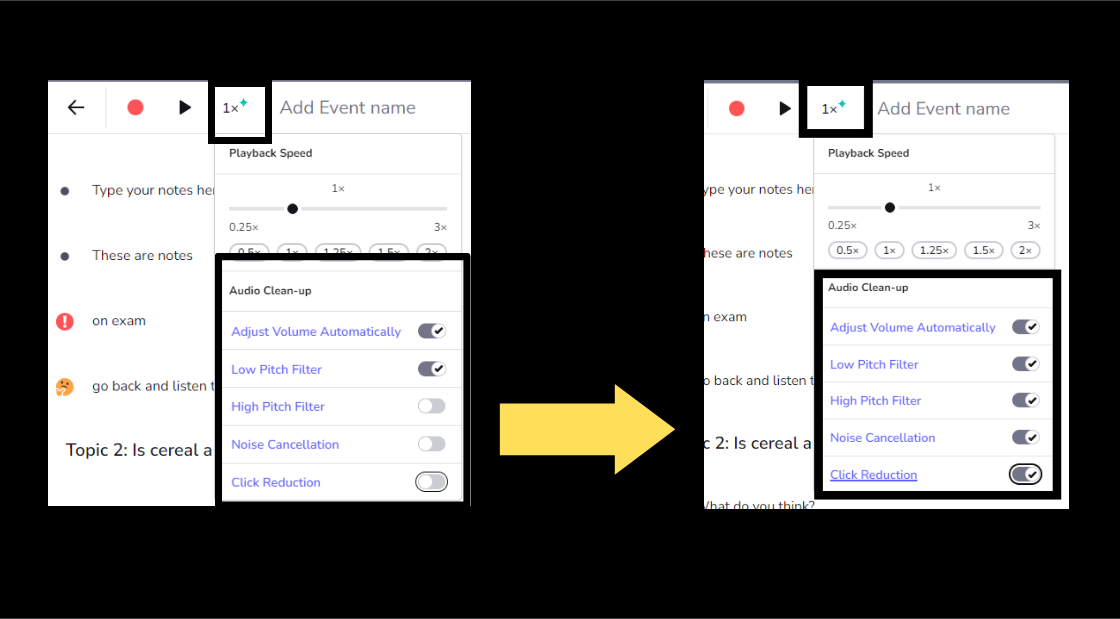
This step is crucial! Go to the 1x button at the top left of your screen. Ensure that all audio cleaning options are checked on. You will need to do this after every recording to get a clean, clear audio playback!

the 1x button is selected on the finished recording. First, the drop down menu that appears has the high pitch filter, noise cancellation, and click reduction options toggled off. An arrow points to the same picture, but with these features toggled on.

Step 8: Transcribe your Audio. 

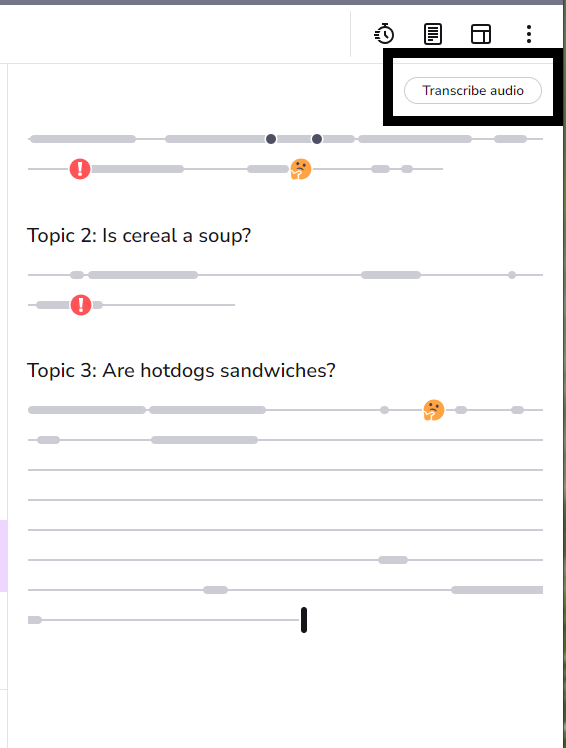
You can transcribe your recording, which will turn the audio into text. Do this by pressing the "Transcribe Audio" button above the recording. This can sometimes take some time. You are able to leave the recording and close your browser, and it will work in the background!

above the audio recording visualization on Glean, the transcribe audio button is highlighted.

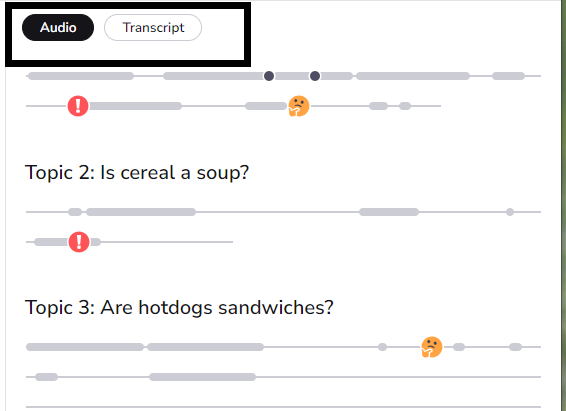
Once Glean finishes transcribing, you can switch between the audio and transcription view by using the buttons above the recording. 

the audio recording visualization on glean. The audio button is selected, so it shows the audio


Your recording will automatically be uploaded to the cloud and saved, as long as you are connected to the internet! Congratulations! You have made a recording on Glean!


How to Use Lightning Mode in Glean

What is Lightning Mode?

Lightning Mode allows you to quickly and easily mark parts of your lecture is important, without having to focus on typing more detailed notes. It is great for students who find it difficult to focus on both the lecture and taking notes at the same time. With lightening mode, you mark what is important, then go back and fill in the gaps later while studying. 

Check out a video from Glean on using Lightning Mode:


Step 1: Begin a Recording

Navigate to Glean and begin a recording, using the steps listed above. 

Step 2: Activate Lightening Mode

Click the lightning bolt icon to the right of the labels. This activates lightning mode. 

the icon for lightening mode is a lightening bolt

Once activated, the text box will disappear.

The icons for notes once lightening mode is activated. The textbox has disappeared.

Step 3: Record and Mark with Icons

Click an icon (or press the corresponding key on your keyboard) to mark a heading, where you wish to review, or an important point. The icons will appear in your recordings and notes, but no text will be attached. 

a recording when lightening mode is used. Icons appear where the user pressed them; however, no text is attached to the notes.

Step 4: Review Recording and Add Notes

When reviewing your class recording, you can go back and add notes. Click on the place in your notes where there is no text, and a textbox will appear. Add appropriate text. 

the user has pressed an empty notes box and is adding text to the box.


A student studies with a computer and textbook open.

How To Review Your Notes After Class

Glean's video above details how to hone in on your notes after class is done. It is important to go back and review your recording after class. This will help you solidify the information you heard, and also allow you to review anything that was unclear. 

Step 1: Enhance your Audio!

It is crucial to enhance your audio before you go back to listen to it in order to get crisp, clear playback. 

Go to the 1x button at the top left of your screen. Ensure that all audio cleaning options are checked on. You will need to do this after every recording to get a clean, clear audio playback!

the 1x button is selected on the finished recording. First, the drop down menu that appears has the high pitch filter, noise cancellation, and click reduction options toggled off. An arrow points to the same picture, but with these features toggled on.

Step 2: Listen to all or part of your recording. 

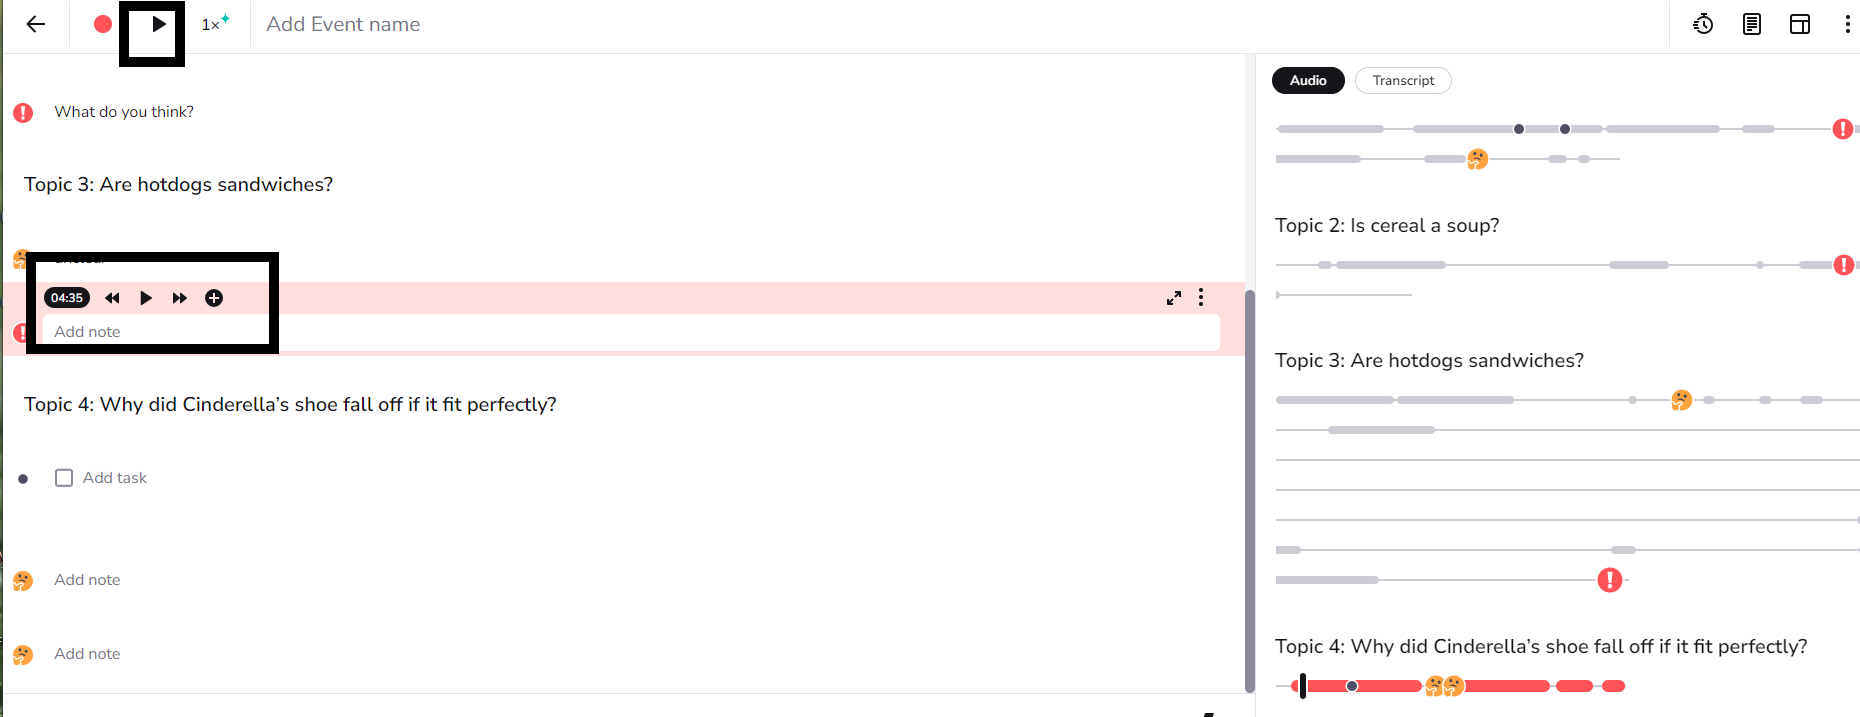
You can listen to the entire recording from the beginning by pressing the play button at the top. You can also click on any note you made, and press the play icon that appears to listen to what was said when you made that note. 

a completed recording. The main play button is highlighted at the top of the screen. The user hovers their cursor over a note, and another play button has appeared as well.

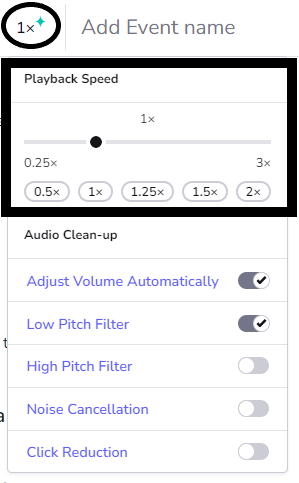
Pro tip: If you need to slow down or speed up the playback, go to the 1x button and adjust the slider. 

The 1x button on the Glean toolbar is selected. There is a slider to adjust playback as well as buttons for set speeds.

Step 3: Add in your notes

You can add notes by clicking in the textbox the appears where you put an icon. Pressing enter will give you a new line 

a note has been selected. The user has added information into the textbox and pressed enter to create a new line. They are in the process of typing in the new box.

Want to add a completely new note as you listen? Just add it in the main textbox at the bottom of the screen as you are listening, then press enter. 

Congratulations! You have enhanced your learning by reviewing your notes!

a female student sits at a desk studying

How to Use A.I. Software to Enhance Your Notes

Not all A.I. use is bad. In fact, when used ethically, A.I. can supplement your learning. You CANNOT use A.I. to write a paper for you, but you CAN use it to help you edit a paper you wrote. Another way that you can ethically use A.I. is to help organize and enhance your notes. 

If you want, you can also watch a video of the steps listed below. 

Steps

  1. Transcribe your audio. Be sure to press the 1x and turn on the audio cleaning features first!
  2. Copy the transcription.
  3. Go to your favorite free AI software (for example, ChatGPTClaude and Pi Ai)
  4. Past the transcription into the chat of the AI software, then enter the following prompt:
    • "Please take this transcription and create a summary and bulleted lecture notes."
  5. Once the first round of transcription is complete, enter this second prompt to get more detailed notes:
    • "Can you make the bulleted notes more detailed?"
  6. From here, copy and paste your notes into a Word or Google doc.

Be sure to review the notes, as there may be some mistakes. Remember- you are the learner, but A.I. can be a good way to supplement your notetaking!